Description[ | ]
The Game Settings are used to set up the game using the available options prior to starting a new game or returning to a previously started game. They allow the player to control many different setting which all have a different effect on the overall experience during game play. the Game Settings can be found in the centre of the screen of the New Game or Continue Game screens and are represented by three or four expanding tabs, clicking on one will expand it and show each setting below the tab and the options available to the right of each setting.
Tabs[ | ]
The Game Settings are represented by tabs that when clicked on will expand to show the options available. There are currently three option tabs available in SurvivalSP, these are titled Difficulty, Gameplay and Misc. If the selected game mode is SurvivalMP a fourth tab titled Multiplayer is also available.
Difficulty[ | ]
This tab is used to adjust the various settings that have an effect over the overall difficulty of the game. Options are available that will alter the aggression and strength of Zombies, spawn rates, damage given and received as well as others. a complete list of the options available on this tab can be found below. Most options are available in both the SurvivalSP and SurvivalMP modes, where settings are exclusive to one game mode it will noted next to its name.
- Difficulty Pre-sets
- This tab changes the difficulty level based on five pre-set configurations, they allow the game to be quickly set to a general difficulty level ranging from very easy to very difficult. Available options are:
- Scavenger: Easiest setting designed for noobs. - Easiest
- Adventurer: Not just a new recruit any more. - Easy
- Nomad: Designed for experienced FPS players. - Normal
- Warrior: Now you're starting to impress. - Hard
- Survivalist: Kids don't try this at home! - Harder
- Insane: You're one brave Mother! - Hardest
- Zombies Run
- Here the player can control the conditions which affect the way Zombies walk and run, the options are:
- Loot Abundance
- Using these settings the player can control the amount of loot found in various storage containers. This ranges from a low setting, making loot very scarce, to a high setting, which will spawn an abundance of lootable items throughout the game. The options available are:
- 25% - This setting will cause a very low amount of loot to be spawned in the game.
- 50% - This setting will cause a low amount of loot to be spawned in the game.
- 75% - This setting will cause a lower amount of loot to be spawned in the game.
- 100% - This setting will cause a normal amount of loot to be spawned in the game.
- 150% - This setting will cause a high amount of loot to be spawned in the game.
- 200% - This setting will cause a very high amount of loot to be spawned in the game.
- Loot Respawn Time
- The time between each loot re-spawn can be controlled by these options. It can be set to 5, 10, 15, 20, 30, 40 or 50 days.
- Drop On Death
- Used to control which items are dropped when the players character is killed, there is a choice of four different options available:
- Everything - Upon dying all items the player is carrying will be dropped leaving an empty backpack and toolbelt. This will spawn a backpack carrying the lost items at the location where the players character died, which can be retrieved.
- Toolbelt Only - Upon dying only the items carried on the players toolbelt are lost, items carried in the players backpack are safe.
- Backpack Only - Upon dying only the items carried in the players backpack are lost, items on the players toolbelt are safe.
- Delete All - Upon dying all items the player is carrying will be deleted and the lost items will not be re-spawned in a backpack, these items are lost forever.
- Drop On Quit - SurvivalMP Only
- Used to control which items are dropped when the player quits a SurvivalMP game, the settings affect which items the player will have remaining upon returning to a game on a server the player has previously quit. the options available are:
- Nothing - With this setting enabled the player will not drop any items they are carrying. Upon quitting the game the players current inventory will be saved by the server and the player will be carrying the same items upon returning to the game, this is server specific.
- Everything - Upon quitting all items the player is carrying will be dropped leaving an empty backpack and toolbelt. This will spawn a backpack carrying the items at the location where the player quit, which can be retrieved.
- Toolbelt Only - Upon quitting only the items carried on the players toolbelt are lost, items carried in the players backpack are safe.
- Backpack Only - Upon quitting only the items carried in the players backpack are lost, items on the players toolbelt are safe.
- Damage Given
- The settings available here control the amount of damage the players character will give when delivering a hit, there is a choice of 5 different options these are as follows:
- Very low - This setting will reduce the damage given level to 50%. Each hit given will inflict half the standard amount of damage.
- Low - This setting will reduce the damage given level to 75%.. Each hit given will inflict three quarters the standard amount of damage.
- Medium - This setting will the damage given level at 100%. Each hit will given inflict the standard amount of damage.
- High - This setting will raise the damage given to level 150%. Each hit given will inflict one and a half times the standard amount of damage.
- Very High - This setting will raise the damage given level to 200%. Each hit given will inflict double the standard amount of damage.
- Damage Received
- The settings available here control the amount of damage the players character will receive when hit, there is a choice of 5 different options these are as follows:
- Very low - This setting will reduce the damage received level to 50%. Each hit received will inflict half the standard amount of damage.
- Low - This setting will reduce the damage received level to 75%. Each hit received will inflict three quarters the standard amount of damage.
- Medium - This setting will keep the damage received level at 100%. Each hit received will inflict the standard amount of damage.
- High - This setting will raise the damage received level to 150%. Each hit received will inflict one and a half times the standard amount of damage.
- Very High - This setting will raise the damage received level to 200%. Each hit received will inflict double the standard amount of damage.
- Enemy Memory
- The time Zombies will spend searching for the player when they have been detected are controlled using these options. They can be adjusted in 15 second intervals and can be set from 30 to 90 seconds.
- Enemy Spawning
- The rate at which Zombies spawn is controlled with these options, there are six different options available:
- Disabled - With the setting at this level there will be no Zombies spawned.
- Very Low - With the setting at this level there will a very low amount of Zombies spawned.
- Low - With the setting at this level there will be a low amount of Zombies spawned.
- Medium - With the setting at this level there will be a normal amount of Zombies spawned.
- High - With the setting at this level there will be a high amount of Zombies spawned.
- Very High - With the setting at this level there will be a very high amount of Zombies spawned.
- Enemy Aggression
- This controls the behaviour of Zombies during the night time, there are two options available:
- Normal - This setting leaves the Zombies to act as normal at night and they will only hunt after the players character if they are detected.
- Feral - This setting is used to simulate the older style of the night time Zombies who are be able to pinpoint the players location and hunt the player down whether they have been detected or not thus making night time very difficult.
Gameplay[ | ]
With the options found here the player can control the settings that affect the time cycle, the percentage of day and night in a given cycle, block durability and other. the list below shows each option available.
- 24 Hour Cycle
- This determines the length in real time expressed in minutes it will take for 24 hours to pass in the game. It can be set at intervals of 10 minutes starting at 10 going up to 40 it then jumps 20 minutes to 60 and doubles for the last two settings of 120 and 240 minutes.
- Perc. of Night (OUTDATED, no longer uses % of night, now straight daylight hours)
- Here the amount of the 24 Hour Cycle that will be night and day can be set, this is expressed as a percentage and allows the player to shorten the night time length when compared to the daytime. There are three options available:
- 50% - If this setting is used the day and night will last an equal time. As an example if the 24 Hour Cycle was set at 60 minutes and this setting is used 30 minutes will be night time and 30 minutes will be daytime.
- 35% - If this setting is used the day will last about 2/3 and the night about 1/3 of the overall time. As an example if the 24 Hour Cycle was set at 60 minutes and this setting is used approximately 20 minutes will be night time and approximately 40 minutes will be daytime
- 20% - If this setting is used the day will last about 4/5 and the night about 1/5 of the overall time. As an example if the 24 Hour Cycle was set at 60 minutes and this setting is used 12 minutes will be night time and 48 minutes will be daytime.
- Block Durability
- Using the settings found here will give the player control over the durability of the blocks found in the game and by increasing or decreasing the Block durability the player can control how easy or hard it is to destroy blocks. there are four options available:
- 25% - This setting will set a very low durability level and it will be very easy to destroy blocks in the game.
- 50% - This setting will set a low durability level and it will be easier to destroy blocks in the game.
- 100% - This setting will set a normal durability level and blocks will be at their default durability.
- 200% - This setting will set a high durability level and it will be hard to destroy blocks in the game.
- Craft Timer
- the settings for the time it takes to craft an item can be set or disabled using the following options:
- None - this will disable the craft timer and all items will be crafted instantly.
- Normal - This will set the craft timer to default and all items will take the normal time to craft.
- Fast - This will set the craft to double speed and all items will take half the normal time to craft.
- Loot Timer
- the settings for the time it takes to loot something can be set or disabled using the following options:
- None - this will disable the loot timer and all loot containers will be looted instantly.
- Normal - This will set the loot timer to default and all items will take the normal time to loot.
- Fast - This will set the craft to double speed and all items will take half the normal time to loot.
- Air Drops
- With the setting found here the player can control the frequency of air drops. They can be set at intervals of 4 hours starting at 8 going up to 24 hours it then changes to 12 hour intervals up to 72 hours. The times given are expressed as in game times.
Multiplayer[ | ]
These setting are only available if the game mode selected is SurvivalMP.
These settings give the player control over the multi-player settings used by the game. With these the player can change the settings of things like friendly fire and friends visibility on the mini map as well as many various controls over the settings used for online play. These include player limits, land protection, public or password protected games as well as other settings. The list below shows the current options available:
- Friendly Fire
- The settings here are used to control whether or not friends can harm each other, Friends are those found on the players friends list, all other players are considered an enemy and can still be harmed when friendly fire is disabled. This is server specific. the current options are:
- On - Friendly fire is enabled and the player can harm their friends.
- Off - Friendly fire is disabled the player cannot harm their friends.
- Show Friend Icons
- This is where the player can control whether or not to allow friend icons to show on the mini map. When enabled the players friends will show up as green triangles on the mini map. the options available are:
- On - Friend icons are enabled and the player can see their friends' locations on the mini map.
- Off- Friend icons are disabled and the player cannot see their friends' locations on the mini map.
- Public/Private
- Here the player will find the settings to allow them to make their game public by registering their Survival MP game to the master game server or they can keep it private. there are two options available:
- Private Game - Using this option will keep the players game private.
- Public Game - Using this option will register the players game to the master game server. This will allow other players to see the players game on the server list.
- Max Players
- This is used to set the cap for the maximum amount of players allowed to play in the game at any given time, this number also includes the players character. these are the options currently available:
- 2 Players - this will set the cap to a two player maximum.
- 4 Players - this will set the cap to a four player maximum.
- 8 Players - this will set the cap to an eight player maximum.
- Game Password
- this an input field used to set the password for access to the players game. Any combination of letters, numbers or symbols can be used. Only players that know the password will have access to the players game, this allows the player to control which players have access. If the player do not enter a password and start a public SurvialMP game any player will be able to access the players game.
- Game Port
- this is the port number that the game communicates with other players on, the default port is 25000 but any available port can be used, this is given along with an IP address of a host client or server that is running a private game. This allows players to connect to a private game not listed on the master game server list.
- NAT Punchthrough
- Using the settings here will allow the player to enable of disable the game from using NAT. This is a router specific option and not supported by all routers. The player should consult the user manual for their router for more specific details. The options available are as follows:
- Enabled - NAT Puncthrough is enabled and can be used by a compatible router.
- Disabled - NAT Puncthrough is disabled and will not be available for use.
- Claim Size
- These settings are used to control the size of the area that a Keystone will protect, this is shown as a value in blocks and refers to a square with sides equal to the value. As an example if used at the default setting of seven blocks it will give the player a 7x7 block protected area. Vertical protection will be based on the same 7x7 area, but covers the entire area from the sky limit all the way down to bedrock. the options here are:
- 7 Blocks This will provide a 7x7 block area of protected land.
- 11 Blocks This will provide an 11x11 block area of protected land.
- 13 Blocks This will provide a 13x13 block area of protected land.
- 15 Blocks This will provide a 15x15 block area of protected land.
- 31 Blocks This will provide a 31x31 block area of protected land.
- Claim Deadzone
- Here the player can control the area around land claim to determine how close another player can build to an existing claim. This is shown as a block value that represents the size of the area in blocks that another player will need to be away from the players claim before being able to place their own Keystone. This is measured from keystone to keystone, the current options are:
- 10 Blocks The minimum distance from the players keystone is 10 blocks before another player can place a keystone.
- 20 Blocks The minimum distance from the players keystone is 20 blocks before another player can place a keystone.
- 30 Blocks The minimum distance from the players keystone is 30 blocks before another player can place a keystone.
- 40 Blocks The minimum distance from the players keystone is 40 blocks before another player can place a keystone.
- 50 Blocks The minimum distance from the players keystone is 50 blocks before another player can place a keystone.
- Claim Duration
- This relates to the amount of time in days it will take a land claim to expire and is taken from the last time a player was online. This means that if the player is playing on a server and has a land claim it will remain theirs for the given length after the last time the player logged on to the particular server. Failing to return to the game before the time limit expires will mean the players land claim will expire and anything contained on the players land claim can now be destroyed, built on or even claimed by another player. The Claim Duration setting is expressed in real days and can be adjusted in one day increments from one day up to five and then it jumps to 10 days.
- Claim Decay Mode
- Here the player will be able to adjust the setting used to control the decay of the effects of land protection. Claim decay applies to the players claim while they are offline. As time passes the protection given by the players land claim decreases and the settings are used to control the speed at which the protection decays. There are three options available:
- Slow - The hardness of the players land claim will decrease slowly over time.
- Fast - The hardness of the players land claim will decrease over a short period of time
- None - The hardness of the players land claim will not decrease at all.
- Claim Health Online
- This is used to control the hardness modifier that is applied to the blocks inside a land claim while the claim owner is online. Expressed as a multiplier it can be adjusted from normal hardness at 1x and doubles each time up to 256x the normal hardness. there is also an option for infinite hardness and this will make the blocks inside a land claim indestructible.
- Claim Health Offline
- This is used to control the hardness modifier that is applied to the blocks inside a land claim while the claim owner is offline. Expressed as a multiplier it can be adjusted from normal hardness at 1x and doubles each time up to 256x the normal hardness. there is also an option for infinite hardness and this will make the blocks inside a land claim indestructible.
Misc[ | ]
This tab lists the settings not relating the specific nature of the previous tabs, although currently it only contains one setting.
- Cheat Mode
- From here the player can use the options to enable or disable cheat mode. With cheat mode enabled the player can access the creative menu in game by pressing the Z key. The creative menu allows the player access to all blocks and items currently found in the game. The options here are simply ON to enable cheat mode and OFF to disable it.
Images[ | ]
Below are some screen shots showing the Game Settings tabs in both a closed and open state for both game types.
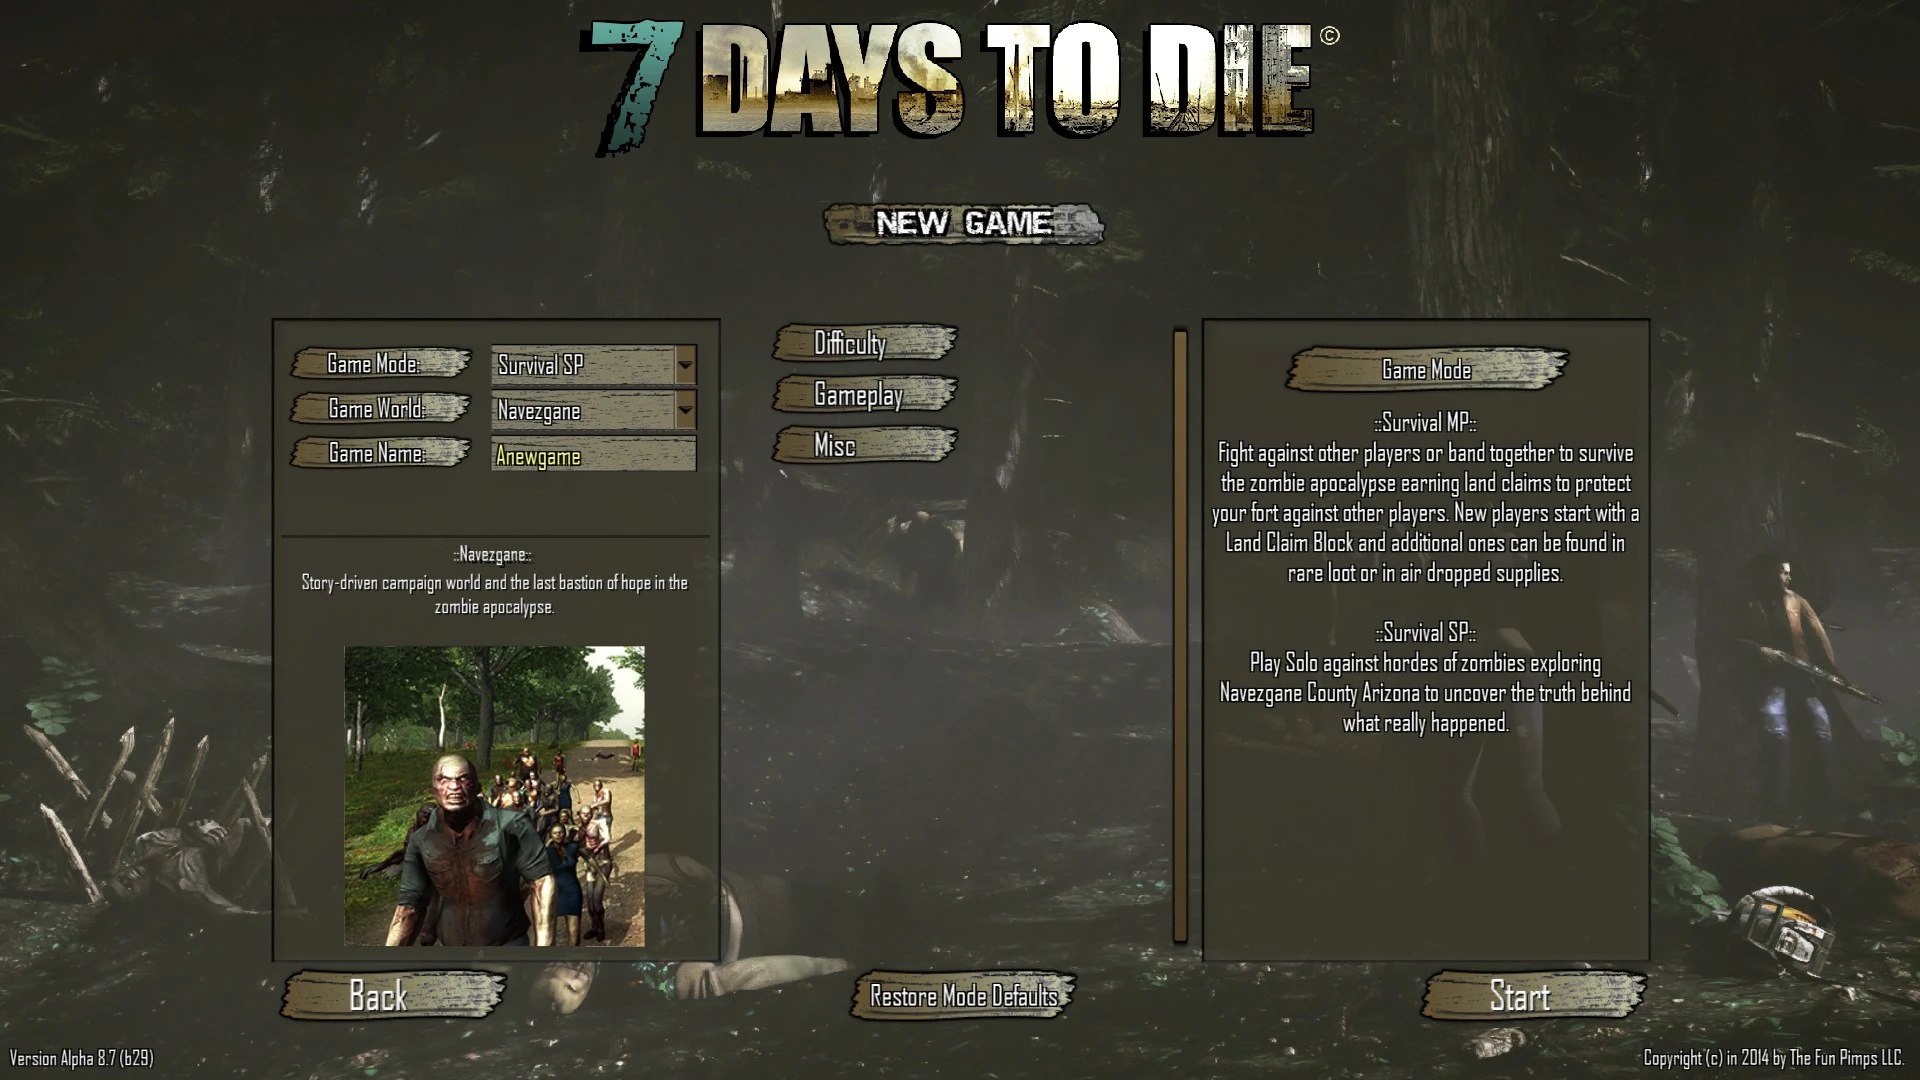
The new game screen showing the three settings tabs for a SurvivalSP game.

The new game screen showing the four settings tabs for a SurvivalMP game.
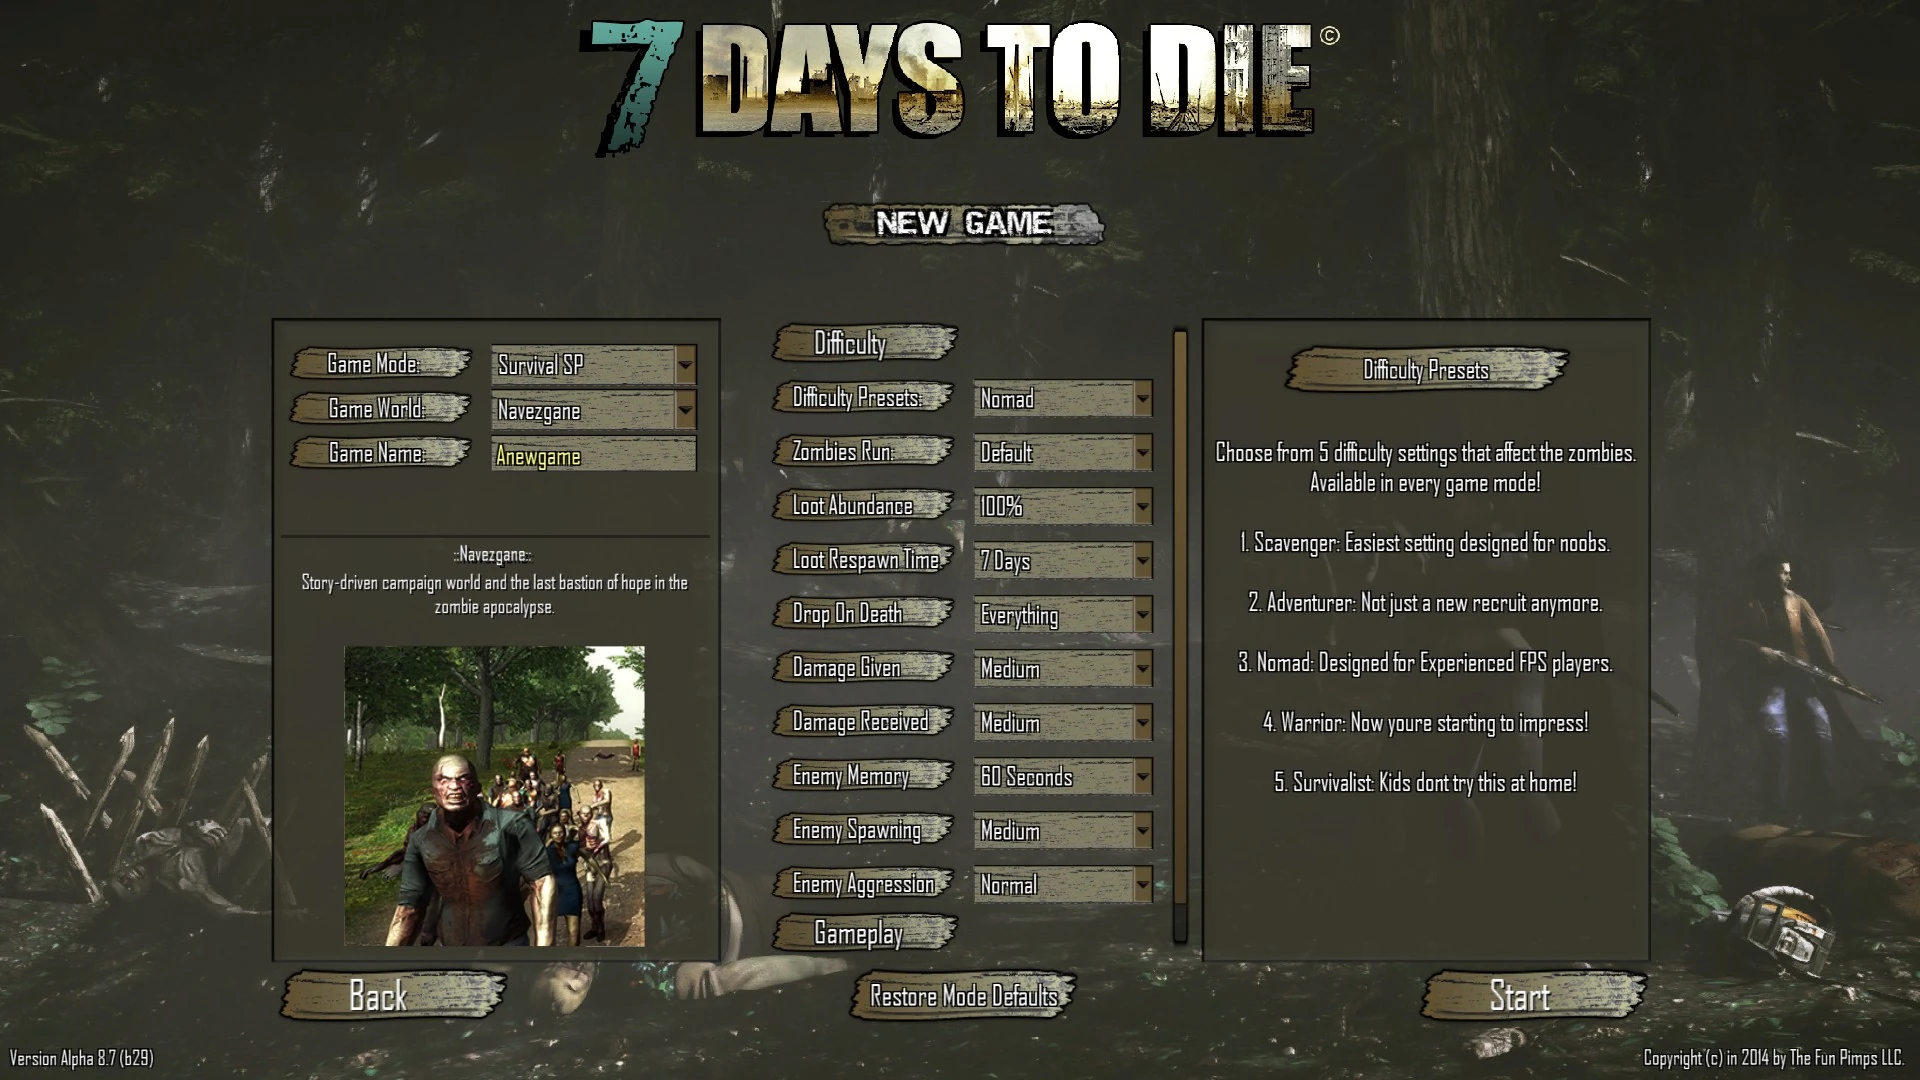
The new game screen showing the Difficulty tab open for a SurvivalMP game.
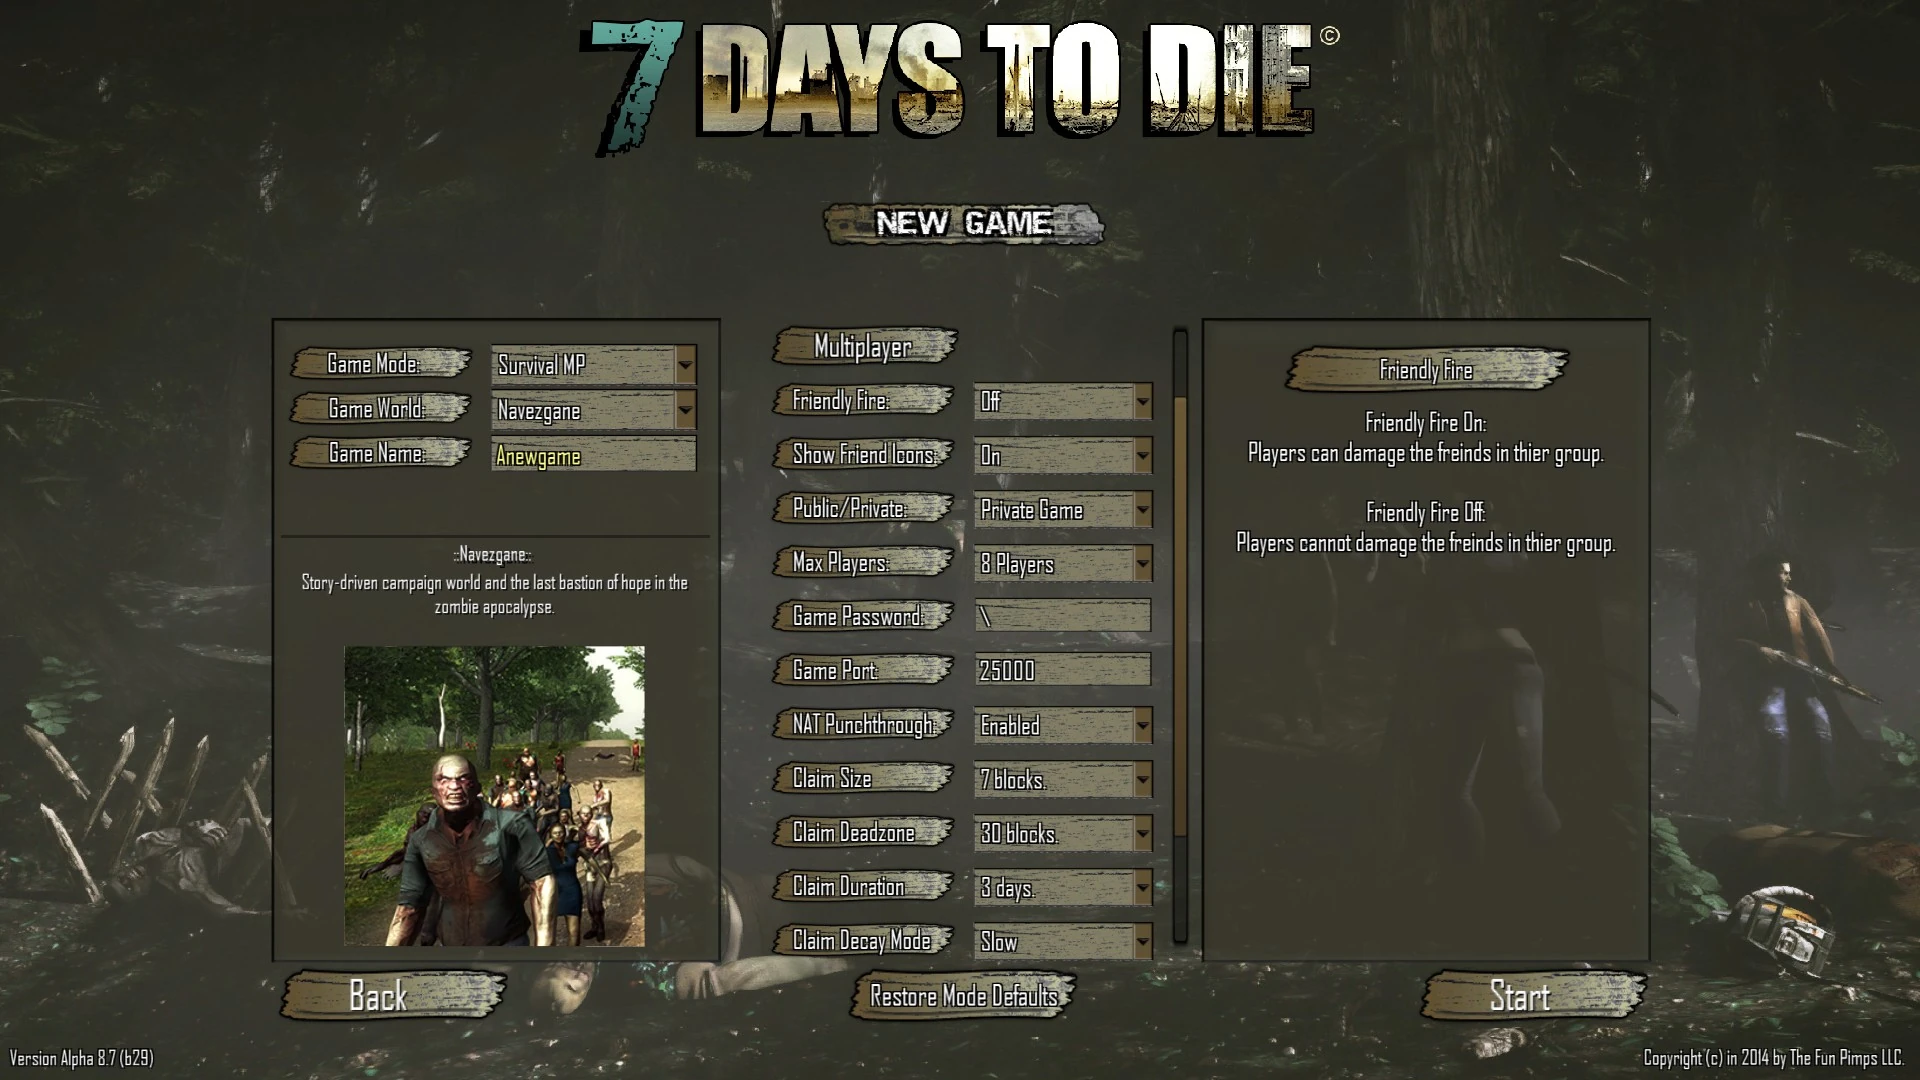
The new game screen showing the Multiplayer tab open for a SurvivalMP game.